| Index | |||
|
||||||||||||
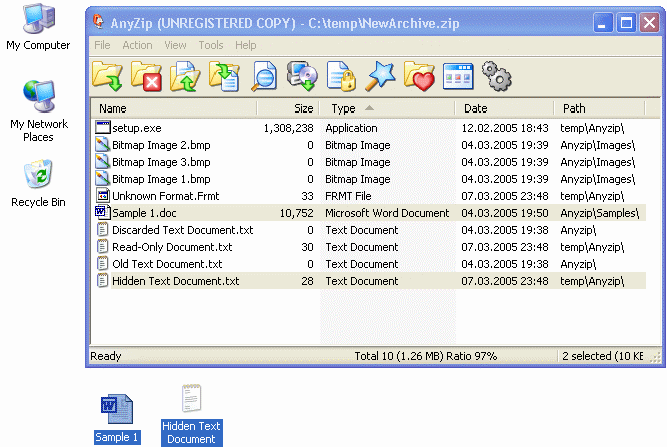
In AnyZip, files can be extracted from an archive using any one of three options. These are extraction through drag-and-drop, through the Windows Explorer interface, using the AnyZip Menu and with AnyZip Wizard. Extraction through Drag-and-Drop In order to extract files using the drag-and-drop option, open the archive file in the AnyZip main window. From this window, click on the files to be extracted. With these files highlighted, drag-and-drop files into the target directory, as in the screenshot below, which shows files being extracted to the Windows Desktop, using the drag-and-drop option.
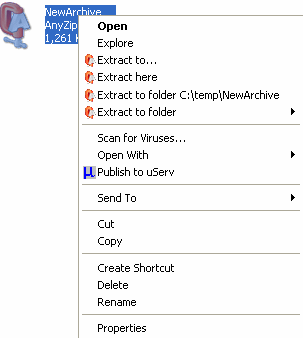
Extraction through Windows Explorer Interface This option allows you to extract all the files in an archive to a specified directory on your computer. In order to do so, right click on the archive file in the Windows Explorer. In the resultant sub-menu, you have four choices for extracting the files, as shown in the screenshot below:
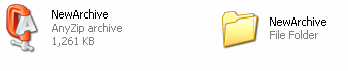
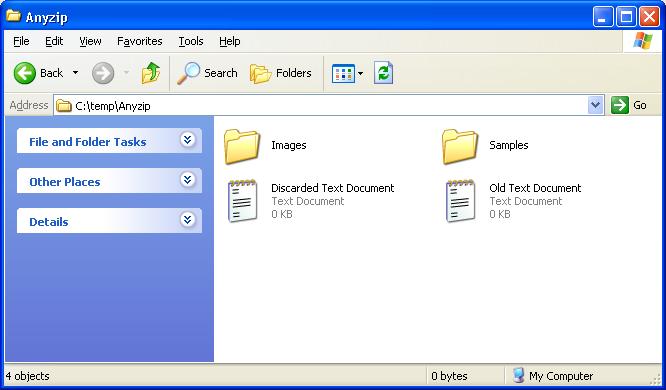
[Extract To]: This option allows you to specify the Windows folder to which the files are to be extracted, before you can run the extract process. When you select this option, the Extract window is launched from where you can select the target folder for extracting the files and folders within the archive to. Please note that this option will extract all files and folders within the archive to the target location. For further information on the various extraction options, please click here. [Extract Here]: When you select this option, AnyZip extracts all the files and folders within the archive into the directory where the archive file is located. In doing so, AnyZip preserves the original file path for all the extracted files and creates the sub-folders exactly as in the original files. [Extract to folder Current location\Zip File Name]: This option is similar to the Extract Here option in that AnyZip extracts the contents of the file to the folder in which the archive file is located. However, in this option you can also specify that AnyZip should create a sub-folder bearing the same name as the archive file. This option is useful if you would like to extract the contents of the archive without overwriting any files already in the target folder that may potentially be overwritten by the extraction. The screenshot below shows the results of such an extraction for the file titled NewArchive.zip. In this instance, AnyZip has created a new folder with the same name as the archive file, which contains all the files within the archive with the proper sub-folders created.
[Extract to Folder]: This option allows you to specify the target folder from the Folder Bookmarks.
You can also run an extraction using
the menu command [Action | Extract]
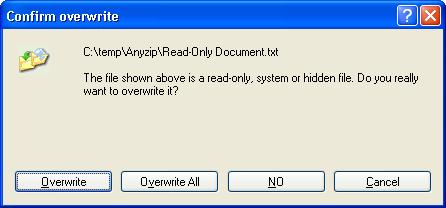
or the Extract button from the AnyZip Toolbar. Wizard Driven Extraction Click here for more details. If the extraction process contains Read-Only files, Hidden files or other System files which will overwrites similar files, AnyZip displays a warning, which is as shown below:
Select Overwrite to replace the file in the target directory with that in the archive file. However, it is recommended that instead of overwriting such files, you either take a backup of the files prior to overwrite or select No from the above screen. At the end of the extraction process the target directory for the extraction is displayed in a new window, to enable you access the extracted content.
Please note that if the complete path of the folders was stored when the files were added to the archive, the extraction will recreate the same directory tree in the target folder as well. Please note that when you perform an extraction through this route, all the files in the archive will be extracted to the target directory.
|
||||||||||||
| Copyright (C) 2001-2006 TurboSoft, Inc. | ||
| |
||