- Overview
- Create an Active Directory bind account
- Configure TurboFTP Server to use Active Directory authentication
- Create an LDAP bind account
- Configure TurboFTP Server to use LDAP authentication
- Refresh user list
Overview
Several techniques can be used to make the connection to the FTP server more secure, and one of them is to use Active Directory or LDAP integrated authentication.
This step-by-step guide will show you how to configure Active Directory and OpenLDAP to use as the authentication provider.
Create an AD Bind account for TurboFTP Server
-
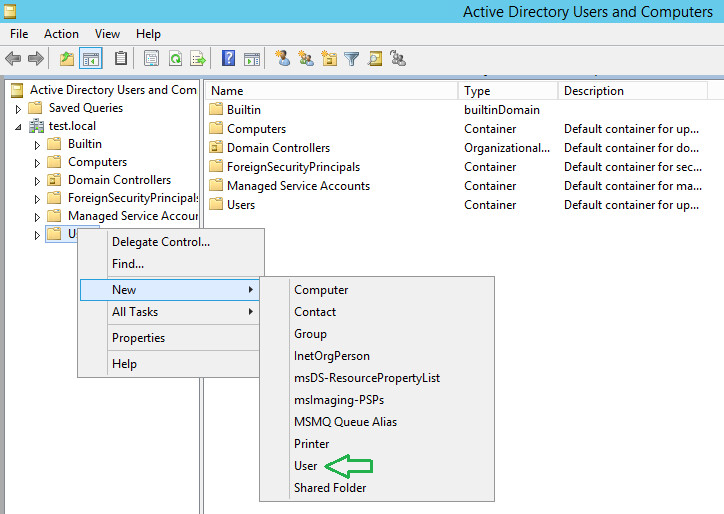
Right-click on Users OU and Select New => User.
-
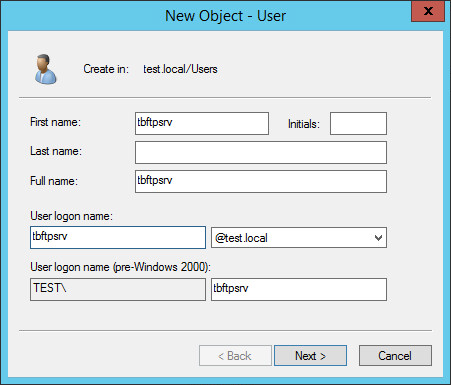
Provide First, Last, Display, and login name and click Next.
-
Specify a password, click Next, and Finish.
-
Using the same approach to create a New User account.
-
Double-click on the newly created user and go to the
Profile tab. -
Specify the path to the
user’s home directory.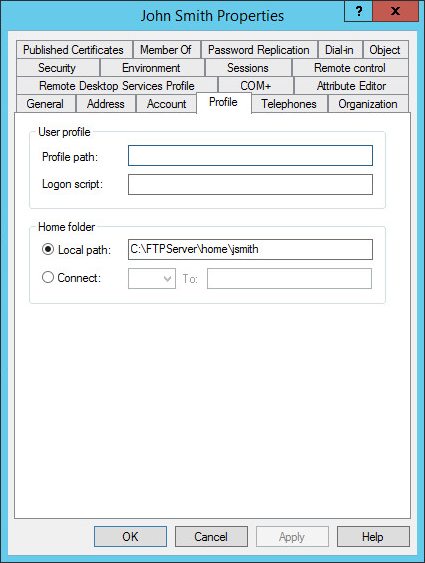


Configure TurboFTP Server to use Active Directory authentication
-
Create
New Domain.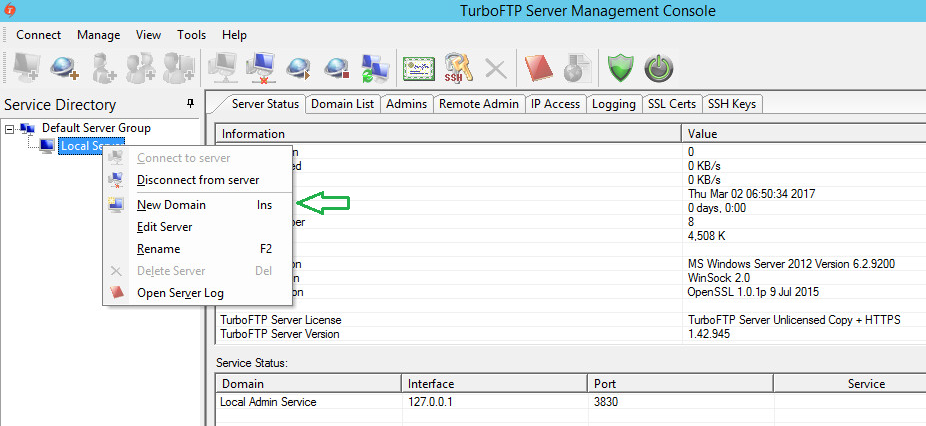
-
Specify the
domain name and IP address.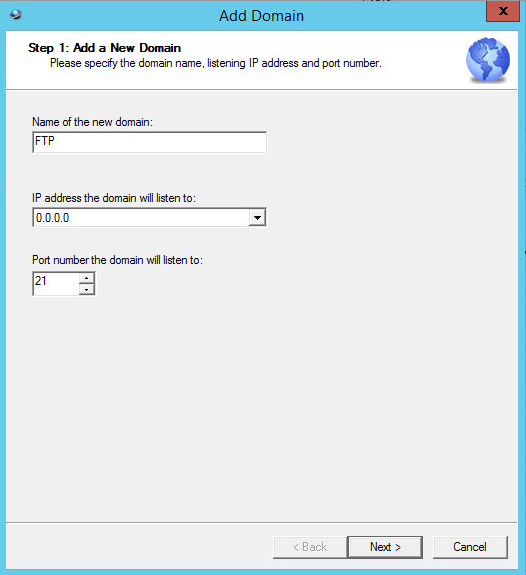
-
Select Active Directory Authentication method and fill all fields.
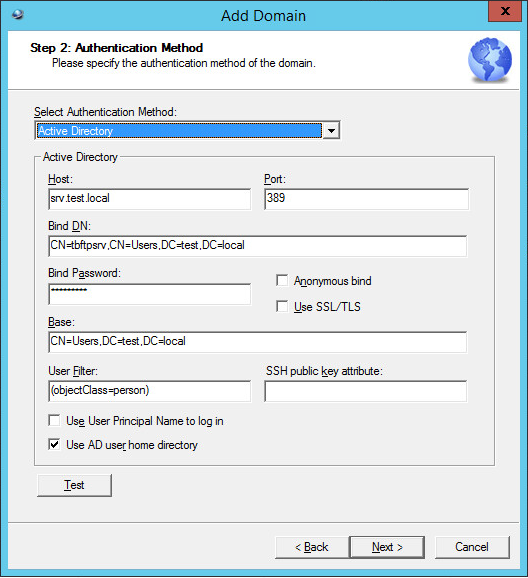
-
You can "Use User Principal Name to log in", so the domain user login name should be in UPN form rather than FQDN.
For example, user (cn=jsmith, OU=Users, DC=test, DC=local) should login as jsmith@test.local. -
Click the
Test button and provide BindDN login and password.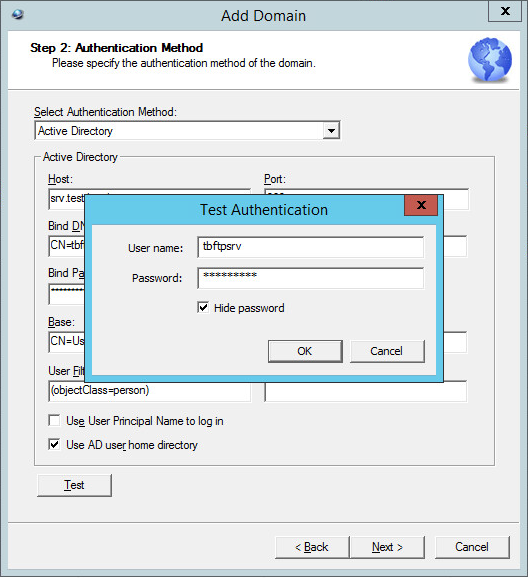
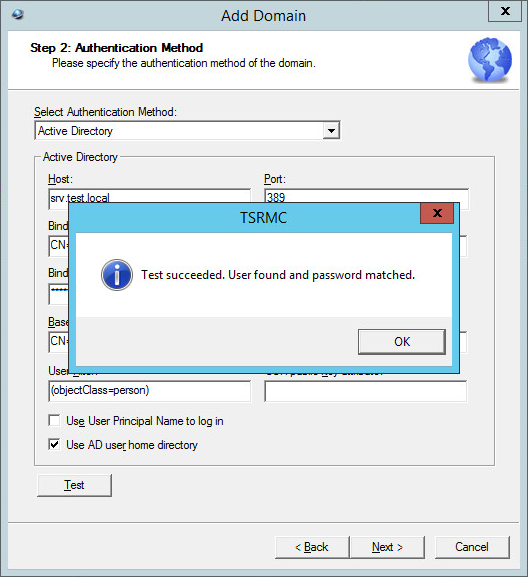
-
If the connection is successful, you will see a confirmation message.
-
Specify the
FTP server's root folder.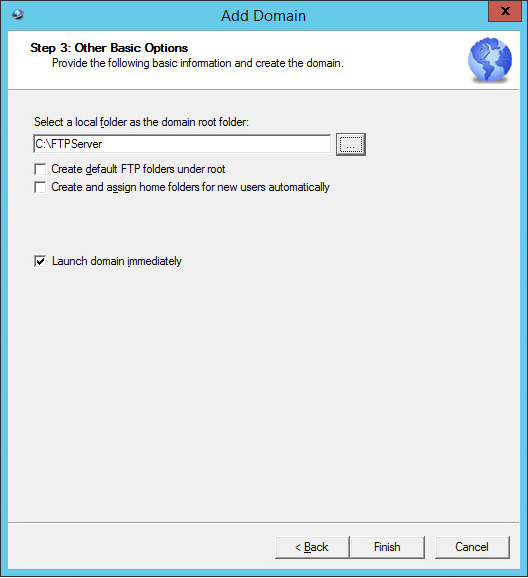


Create an LDAP bind account
-
Create an answer file named tbftpsrv.ldif
dn: ou=Users,dc=test,dc=local
objectClass: organizationalUnit
ou: Usersdn: uid=tbftpsrv,ou=Users,dc=test,dc=local
objectClass: inetOrgPerson
objectClass: posixAccount
objectClass: shadowAccount
uid: tbftpsrv
sn: tbftpsrv
givenName: tbftpsrv
cn: tbftpsrv
displayName: tbftpsrv
uidNumber: 10000
gidNumber: 5000
userPassword: !TurboFTP_Bind_Account_Password!
gecos: tbftpsrv
loginShell: /bin/bash
homeDirectory: /home/tbftpsrv -
Add bind account to the LDAP directory.
ldapadd -x -D cn=admin,dc=test,dc=local -W -f tbftpsrv.ldif -
You will be asked for admin password.
Enter LDAP Password: ******** -
If password is correct you will see that info from the file has been added.
adding new entry "ou=Users,dc=test,dc=local"
adding new entry "uid=tbftpsrv,ou=Users,dc=test,dc=local" -
Using the same approach create New User account by creating a new file jsmith.ldif
dn: uid=jsmith,ou=Users,dc=test,dc=local
objectClass: inetOrgPerson
objectClass: posixAccount
objectClass: shadowAccount
uid: jsmith
sn: Smith
givenName: John
cn: John Smith
displayName: John Smith
uidNumber: 10001
gidNumber: 5001
userPassword: !UserPassword!
gecos: John Smith
loginShell: /bin/bash
homeDirectory: /home/jsmith
Configure TurboFTP Server to use LDAP authentication
-
Create New Domain.
-
Specify a
domain name and IP address. -
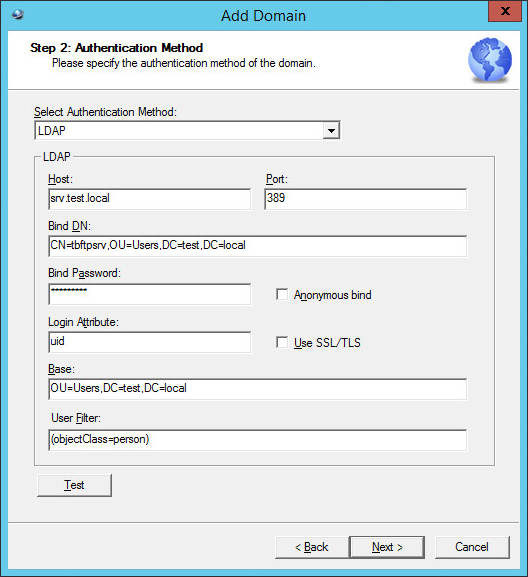
Select the LDAP Authentication method and fill in all fields.
-
You can "Use User Principal Name to log in", so the domain user login name should be in UPN form rather than FQDN.
For example, user (cn=jsmith, OU=Users, DC=test, DC=local) should login as jsmith@test.local. -
Click the
Test button and provide BindDN login and password.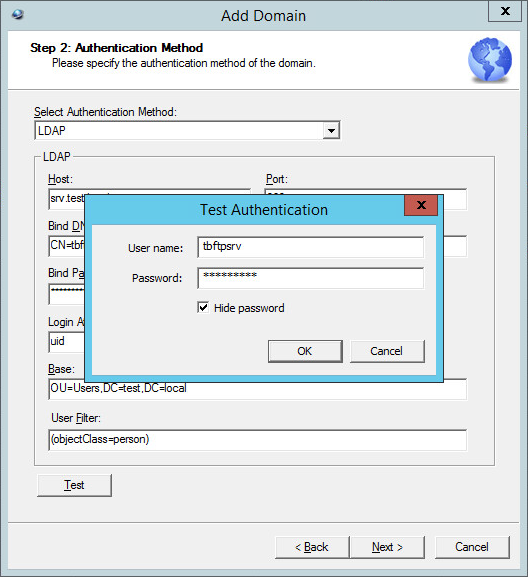
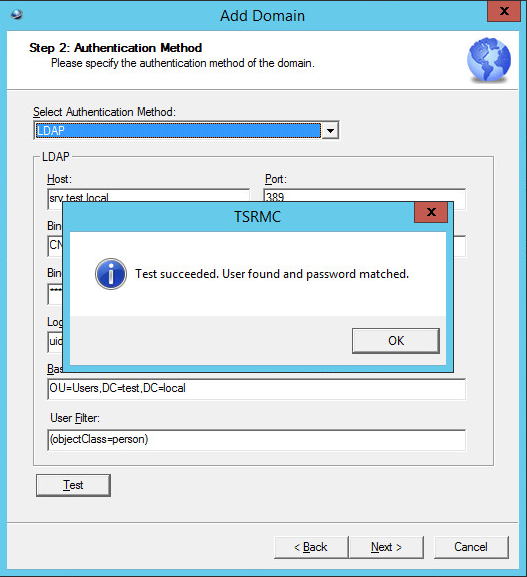
-
If the connection is successful, you will see a message.
-
Specify the
FTP server root folder.


Refresh user list
-
By default, TurboFTP Server doesn’t refresh the AD users list, so it’s empty. To refresh the user list, click on the Refresh button.

-
Now users list should be populated.


