TurboFTP Server can run as an SFTP Server or Secure FTP Server, allowing the administrator to control user connection access and directory permissions at granular levels.
This article illustrates how to manipulate user connection attributes with user class and manage directory access in a domain's Virtual File System. Finally, we demonstrate how to connect and control the TurboFTP Server remotely.
User Connection Control Attributes
Example 1. Create a user class and configure its connection attributes.
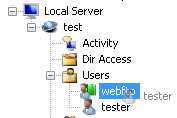
We have created a domain 'test', under which we have created user 'tester' and user class 'webftp'.
General Configurations of User Class
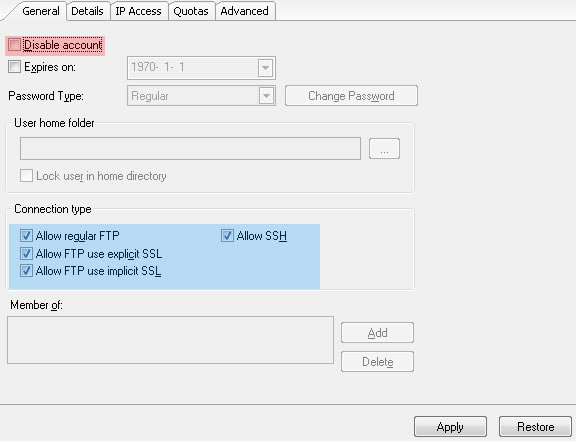
To add user 'tester' into user class 'webftp', drag and drop 'tester' into the 'webftp' node. Once a user becomes a member of a user class, all attributes of the user class apply to this user except some user-specific attributes like login credentials, home folder, etc. For example, the following user attributes under the General tab are configurable for a user class:
- Disable account
- Connection types
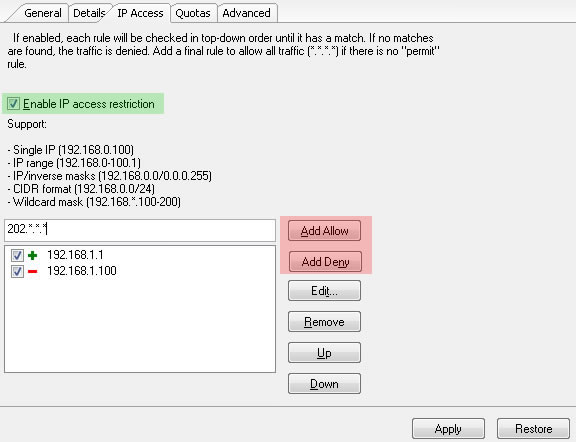
Configuring IP Access of a User Class
To employ IP access rules on a user class, enable the IP access restriction first. We then add IP rules in one of the supported formats. 'Allow' rules are indicated by a '+' sign, and 'Deny' rules by a '-' sign.
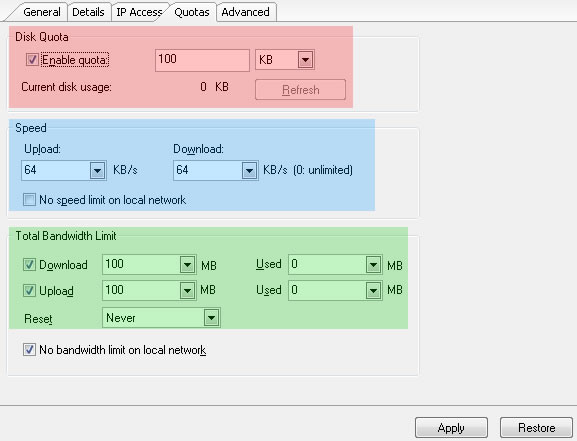
Configure Quotas of a User Class
The Disk Quota controls the maximum disk space the user class can use. The transfer speed can be throttled for upload and download. An administrator might also want to enforce limits on the total bandwidth consumed by the users on a daily or monthly basis; the options of Total Bandwidth Limit come in handy.
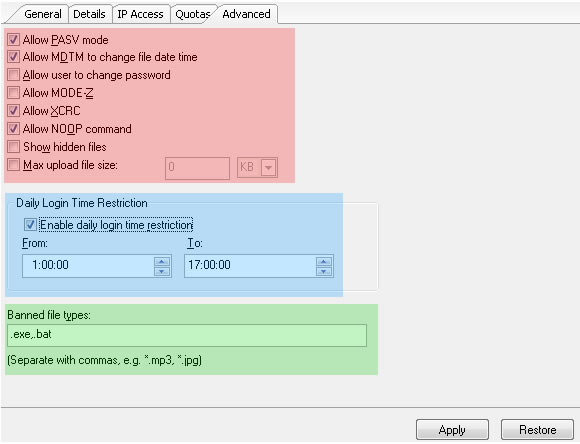
User Class Advanced Options
Some of the features here require support on the server side:
XCRC, MDTM (setting file time), SITE PSWD.
For example, the FTP server must support SITE PSWD command to allow users to change their login password from an FTP client. The server must support the MODE-Z feature to enable the on-the-fly data compression feature to be turned on. It is worth noting that many server products understand the primary form of MDTM command, which is used to retrieve remote file timestamps (a 'get' operation). Still, not all servers know when it is intended to change the time of files on the server( a 'set' operation).
Configuring Directory Access
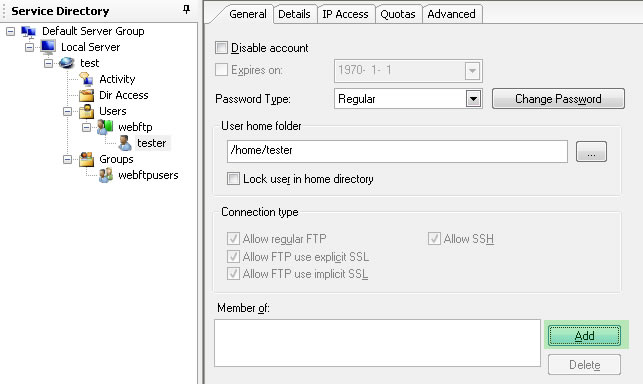
EXAMPLE 2: We create user group 'webftpusers', add user 'tester' to this group, and set up the directory access for it.
On the Service Directory tree, click on user 'tester', go to the General tab, and click on the 'Add' button.
The 'Add Group Membership' dialog appears, and we select the user group 'webftpusers' and then click OK.
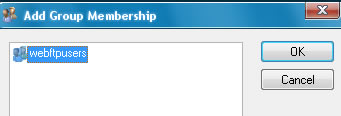
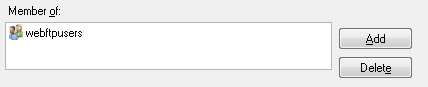
Now, the user group 'webftpusers' appears in the 'Member of' list.
Setting up Directory Access
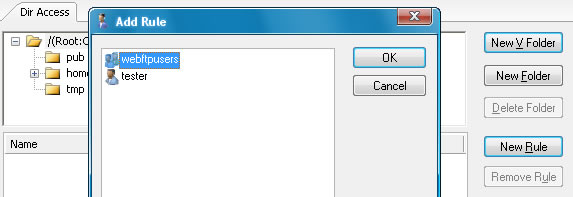
Click on the 'Directory Access' node under the domain 'test' and select the folder you are interested in the right panel.

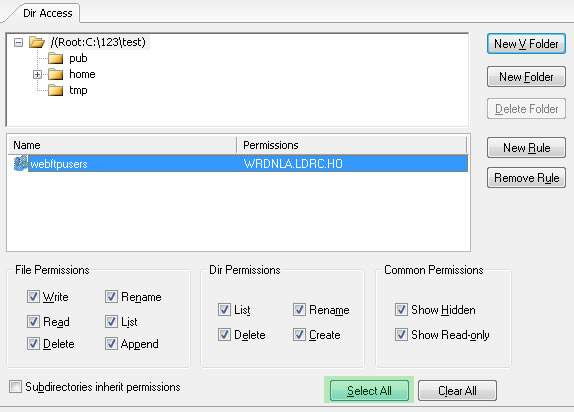
Click on 'New Rule' and select 'webftpusers' from the popped-up dialog. Check 'Grant all permissions' if you want to grant complete control. Click on OK.
Please note that if you see all permissions grayed out when you click on a user or user group, this permission rule is inherited from the current folder's parent.
TurboFTP Server Remote Administration
You can manage TurboFTP Server locally or remotely (in a local network or over the Internet).
EXAMPLE 3: Set up and test remote administration
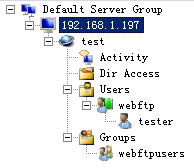
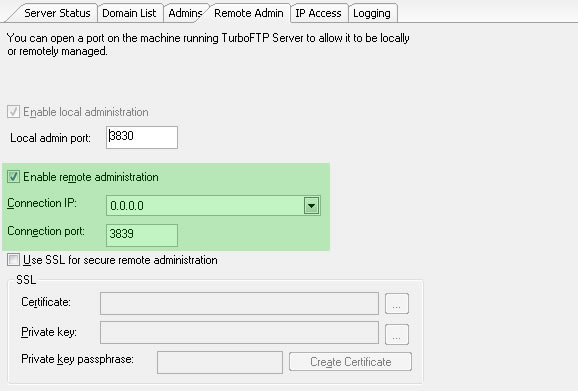
We connect TSRMC with the local TurboFTP Server service (on Computer A, with IP 192.168.1.197), go to Server -> Remote Admin, and enable remote administration.
Open TSRMC on another computer (B) where you want to manage TurboFTP Server on Computer A remotely. Add a server, enter IP 192.168.1.197, and name it '192.168.1.197' too. Select 'Remote' under 'Server Type', as shown below. Keep the default server port.
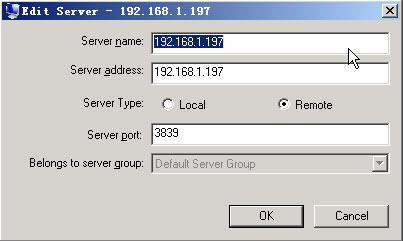
Click OK to close the dialog. Then double click on the new server '192.168.1.197', enter administrator credentials and click 'Connect'.

If the connection to the remote TurboFTP Server establishes successfully, the server will populate with all the domain and user information, as shown below.