TurboFTP Upload Wizard
The following steps will guide you in the use of the TurboFTP Wizard.
Step 1. Enable upload files using Shell context menu
To use the wizards right from the Windows Shell, make sure you have enabled the following checkboxes in [Options | Advanced] of TurboFTP main program.

Figure 1.1
Step 2. Select files to upload in the Windows Shell
(Windows Explorer) and bring up the context menu by right-clicking on the selected files.
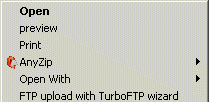
Figure 1.2
Step 3. Click on menu [Upload with TurboFTP wizard] to
proceed with the Wizard to upload selected files to an FTP server.
Step 4. A dialogue box will appear as shown in Figure 1.3
below. A description of the UI Elements of the Wizard follows.
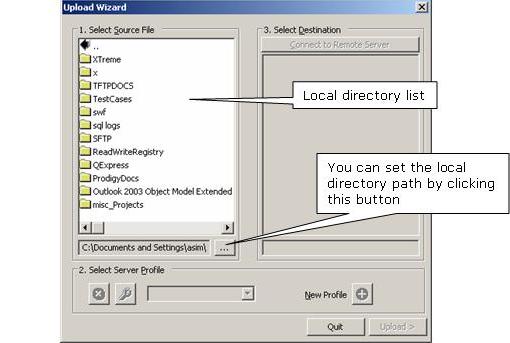
Figure 1.3
Step 5. When you click the ... button shown in Figure
1.3 above, it will display a list of folders on your local drive to select from.
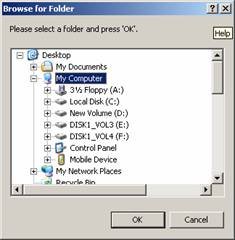
Figure 1.4
Step 6. Selecting any folder or file from the local
directory will enable the Profile dropdown list. Now you can either select an available profile, or create your own profile by giving a profile name and clicking the New Profile button as shown in Figure 1.5 below.
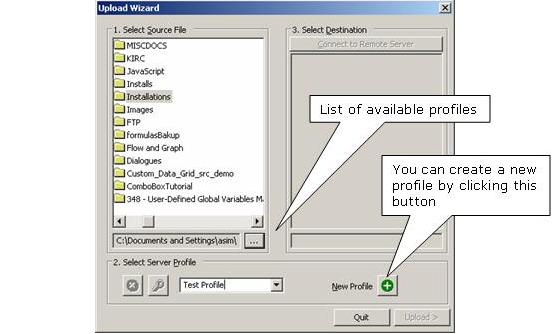
Figure 1.5
Step 7. Clicking the New Profile button will display a
configuration window, with different tabs showing configuration parameters according to category.
Step 8. The Server tab consists of basic FTP/SFTP
Server configurations, such as Server Type, Hostname and Port. If you already have an account on the FTP Server, then uncheck the box with Anonymous and provide your User Name and Password, as shown in Figure 1.6 below.
For SFTP, select Auto Detect as Server Type and select [Secure Connection Type | SFTP over SSH] under tab [Security] (see Step 11).
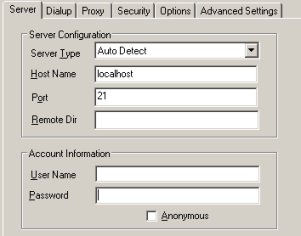
Figure 1.6
Step 9. If you want the application to connect through a dialup account, then enable Dialup Setting as shown in figure 1.7 below and provide the required information.
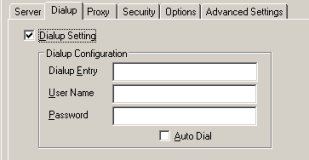
Figure 1.7
Step 10. If you are using a Proxy server for connection, then configure the Proxy Server settings as shown in Figure 1.8 below.
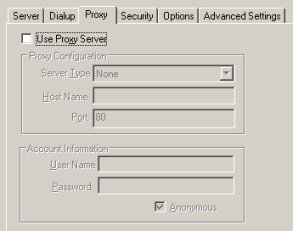
Figure 1.8
Step 11. The Security tab consists of types of secure connections: Standard, Implicit SSL, Explicit SSL, TLS and SFTP over SSH, as shown in Figure 1.9 below.
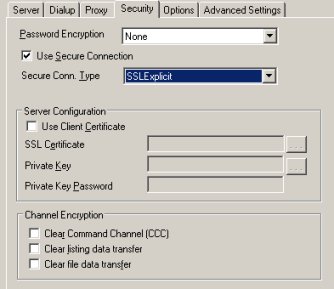
Figure 1.9
Step 12. Enabling [Use Client Certificate] allows you to use the Client Certificate in SSL or Public Key Authentication in SFTP/SSH.
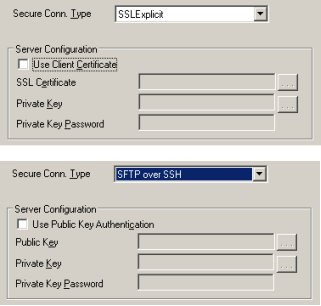
Figure 1.10
Step 13. You can configure further optional parameters, such as Timezone Difference, Buffer Size, Log File, and default Local Directory as shown in Figure 1.11.
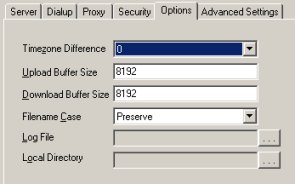
Figure 1.11
Step 14. Advanced Settings allows you to specify Password Encryption, Login attempts, Delay, IP binding, and Port ranges, etc.
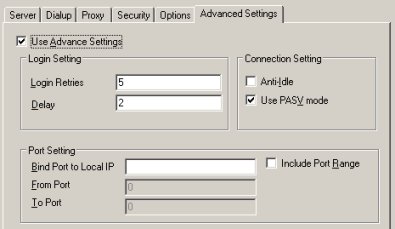
Figure 1.12
Step 15. Click on the Save button to save all configurations.
Step 16. Now click on Connect to Remote Server, as shown in Figure 1.13 below, to connect to the remote host.
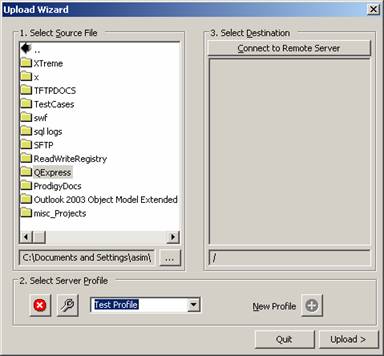
Figure 1.13
Step 17. When the connection is established, the Remote Directory List will be displayed in the panel, as shown in Figure 1.14 below.
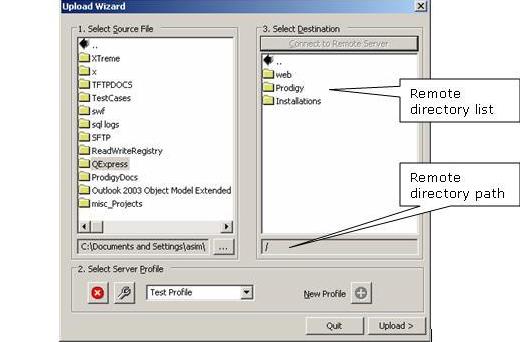
Figure 1.14
Step 18. You can delete or modify the profile by clicking the buttons as shown in Figure 1.15 below.

Figure 1.15
Step 19. Now select the local directory from the left panel and press the Upload button to upload the folder to the remote destination.
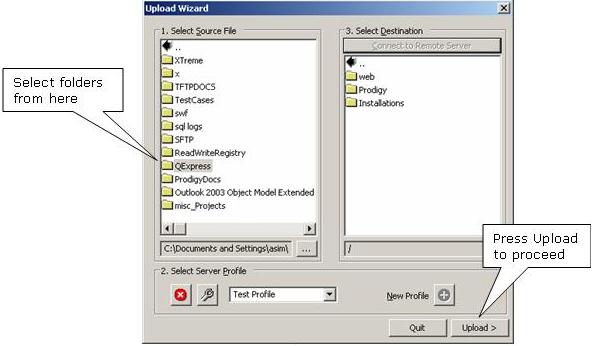
Figure 1.16
Step 20. The file transfer progress and log will be displayed while the folder is being uploaded. You can cancel the transfer at any time by pressing the Abort button.
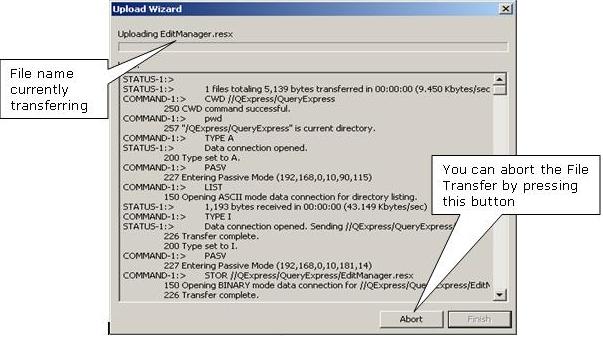
Figure 1.17